 Merken
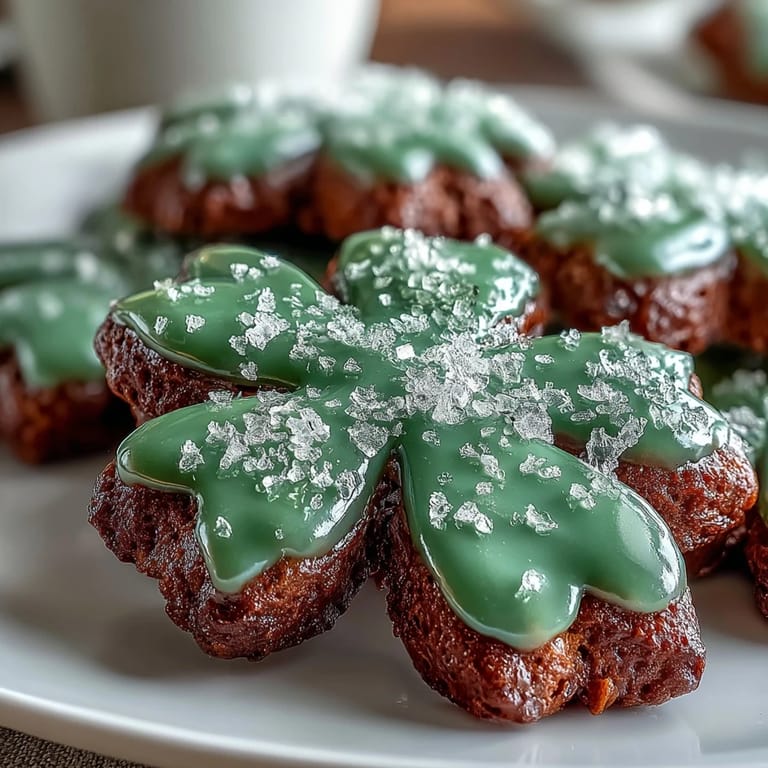
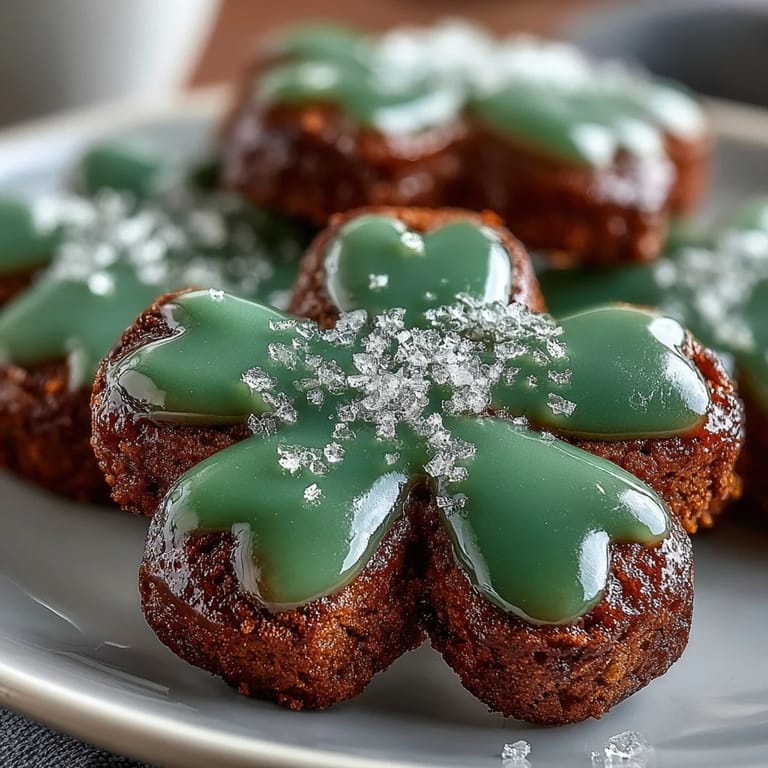
 My sister arrived at my kitchen door one March afternoon with absolutely no plan except "we should make something green." Three hours later, surrounded by flour dust and the sweet smell of vanilla, we'd created these shamrock cookies that somehow turned an ordinary Tuesday into something worth remembering. The green royal icing caught the light like we'd bottled spring itself, and suddenly St. Patrick's Day felt less like a calendar date and more like an excuse to be playful together.
I'll never forget watching my coworker's face when I brought a box of these to the office potluck. She picked one up carefully, as if it might be too pretty to eat, then bit into it and got that quiet look people get when something tastes exactly right. That's when I realized these cookies aren't just decorative—they're genuinely delicious, which somehow makes the effort worth it.
Ingredients
- Unsalted butter, softened (1 cup/225 g): This is your foundation, so let it sit at room temperature until it's actually soft, not just cold and spreading. Cold butter won't cream properly and your cookies will be dense instead of tender.
- Granulated sugar (1 cup/200 g): Creaming butter and sugar together is where the magic starts—don't skip this step or rush it.
- Large egg (1): Room temperature works best for mixing smoothly into your dough.
- Pure vanilla extract (1½ teaspoons): The vanilla does real work here, not just adding flavor but contributing to that tender crumb.
- Almond extract (½ teaspoon, optional): This is your secret weapon if you want something just slightly different from a basic sugar cookie.
- All-purpose flour (2¾ cups/345 g): Measure by spooning flour into your cup and leveling it off—scooping directly from the bag often gives you too much.
- Baking powder (½ teaspoon): Just enough lift to keep cookies tender without making them cakey.
- Salt (½ teaspoon): This brightens the butter flavor in a way people can't quite name but absolutely notice.
- Powdered sugar for icing (3 cups/360 g): Sifting this is actually important—clumpy icing never looks smooth no matter how hard you beat it.
- Meringue powder (2 tablespoons): This creates that glass-like finish and makes the icing food-safe without raw egg whites.
- Warm water (4–5 tablespoons): Add it gradually because icing consistency is everything—too thin and it runs off, too thick and piping becomes miserable.
- Green gel food coloring: Gel holds color better than liquid and won't thin your icing like drops would.
Tired of Takeout? 🥡
Get 10 meals you can make faster than delivery arrives. Seriously.
One email. No spam. Unsubscribe anytime.
Instructions
- Cream Your Butter and Sugar:
- In a large bowl, beat softened butter and sugar together with an electric mixer for about 2–3 minutes until it looks light, pale, and almost fluffy. You'll actually hear the mixer working differently once it's ready—it becomes airier and less dense.
- Add the Wet Ingredients:
- Pour in the egg, vanilla, and almond extract if using, beating until everything looks combined and smooth. At this point your mixture should smell wonderful and feel like silk.
- Mix in the Dry Ingredients:
- In a separate bowl, whisk together flour, baking powder, and salt. Add these to your wet ingredients gradually, mixing on low speed just until everything comes together. Stop mixing the moment you don't see dry flour anymore—overmixing makes cookies tough.
- Chill the Dough:
- Divide dough in half and flatten each piece into a disc, then wrap tightly in plastic wrap. Refrigerate for at least one hour, though overnight works beautifully too. Cold dough is easier to handle and bakes into cookies with better shape.
- Preheat and Prepare:
- Get your oven to 350°F (175°C) and line two baking sheets with parchment paper. Cold sheets and parchment make cleanup easier and help cookies bake evenly.
- Roll and Cut:
- On a lightly floured surface, roll out one dough disc until it's about ¼-inch thick. Use your shamrock cutter to press out shapes, spacing them about 1 inch apart on your prepared sheets. Gather scraps and gently re-roll them—this is not the time to be precious.
- Bake Until Just Golden:
- Bake for 8–10 minutes until the edges are just barely turning golden. The centers will look slightly underbaked, which is exactly right. Let cookies cool on the baking sheet for 5 minutes, then transfer to a cooling rack to cool completely before icing.
- Make Your Royal Icing:
- Combine sifted powdered sugar, meringue powder, and vanilla in a bowl. Add warm water one tablespoon at a time, beating on low speed until you have stiff but pipeable peaks. This takes patience—add too much water and you're starting over, so go slowly.
- Tint and Transfer:
- Add green gel food coloring a tiny bit at a time, mixing thoroughly before adding more. Transfer icing to a piping bag fitted with a small round tip—you want control here.
- Decorate with Care:
- Pipe an outline around each shamrock first, then flood the center with icing, using a toothpick to spread if needed. Add sprinkles, glitter, or details while the icing is still wet. Let everything dry completely, which takes a few hours, before packaging or serving.
 Merken
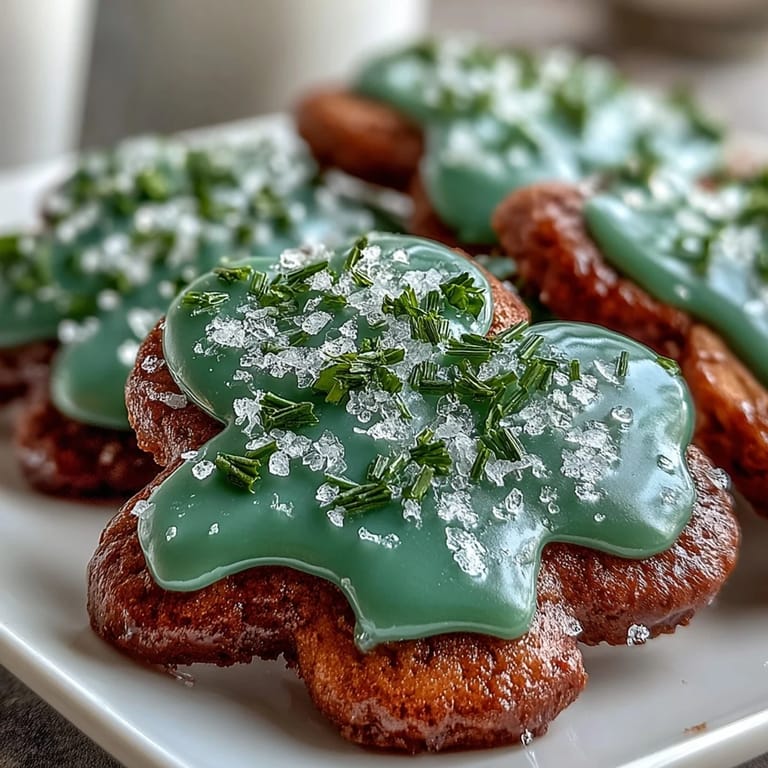
 There's something almost ceremonial about watching royal icing dry on cookies, the way it transforms from glossy and wet to hard and jewel-like. My daughter spent an entire afternoon watching them set, checking every few minutes as if she could speed up the magic with her attention alone.
Why These Cookies Matter
Sugar cookies feel simple until you realize they're actually a blank canvas for whatever celebration you need. They don't demand fancy ingredients or restaurant-level technique—just precision, patience, and a little bit of care with the timing. Something shifts when you hand someone a cookie that you actually decorated yourself instead of bought in a bakery box.
Flavor Variations to Try
Once you've made these the traditional way, the fun part is playing around. Lemon zest instead of almond extract gives them brightness, or try orange zest for something deeper and more complex. Some people add a whisper of cardamom or even a tiny pinch of black pepper—ingredients that seem strange until you taste them and wonder why they're not in every sugar cookie.
Timing, Storage, and Serving Suggestions
These cookies actually improve slightly after a day as the flavors meld together, so baking them the day before you need them is never a bad call. Keep them in an airtight container at room temperature for up to a week—the hardened royal icing actually protects them from going stale too quickly.
- If you're gifting these, stack them in layers separated by parchment paper inside a pretty box for that personal touch that says you actually cared.
- Pair them with Irish coffee, mint tea, or even just cold milk for a moment that feels more intentional than just eating a cookie.
- Royal icing that's hardened completely is food-safe and holds its shape for weeks, making these perfect for ahead-of-time planning.
 Merken
 These shamrock cookies are proof that the most memorable foods are usually the ones made with someone you actually like, in a kitchen that smells like butter and intention. Make them for yourself, for someone you love, or just because March deserves to be a little greener.
Antworten auf häufige Fragen
- → Wie erhält man den perfekten Royal Icing?
Der Zuckerguss besteht aus Puderzucker, Baiserpulver, etwas Wasser und Vanille. Wichtig ist, dass die Masse steif geschlagen wird, aber noch gut spritzbar bleibt. Ein paar Tropfen Lebensmittelfarbe sorgen für den typischen Grünton.
- → Wie lange sollte der Teig gekühlt werden?
Der Teig wird mindestens eine Stunde im Kühlschrank gekühlt. So lässt er sich besser ausrollen und behält beim Backen seine Form.
- → Kann man den Mandelgeschmack variieren?
Ja, alternativ zum Mandelaroma kann auch Zitronen- oder Orangenschale verwendet werden, um einen frischen Twist zu erzielen.
- → Worauf sollte man beim Backen achten?
Die Kekse sollten goldgelb gebacken werden, aber nicht zu dunkel, um eine schöne weiche Textur zu erhalten.
- → Wie bewahrt man die Kekse am besten auf?
Nach dem Trocknen des Zuckergusses lassen sich die Kekse luftdicht verpacken und bleiben einige Tage frisch.